Mounting silk onto foamboard
Marianne Nash
Decide size of picture and board.
Cut silk 1.5” – 2” larger all round than board, to allow for turnings onto the back.
Lay silk right side up on top of board, with excess hanging over edges. Stick a pin through the silk into the centre of the board on its top narrow edge. I like to push the pin only half way in, as it is easier to get hold of when making adjustments, or moving pins along.
Turn the whole thing over and ensure that edge of silk is running parallel to edge of board (eg 1” turned over along whole length). Put more pins along top edge about 1.5” apart, working your way from the centre pin to the sides.
Turn the whole thing over again, silk right side up.
Put a pin through the silk into the centre of the narrow bottom edge of the board, opposite the top one, pulling the silk taut, but not too tight. Stick pins all along the bottom edge, as for the top edge, pulling taut each time, with pins opposite top ones. Put pin through silk into the middle of one of the sides, and match with a pin on the opposite side, pulling taut. Finish sides off as for the top and bottom.
Make mitres at the corners as best you can. Looking at the right side, adjust pins and stretch to avoid puckers.
On back use 1” - 2” lengths of masking tape to stick silk onto the board, pulling taut. Take extra care with the corners. If you use longer lengths of tape, and find puckers appear, it will be harder to unpeel it all and adjust it.
Make sure you have a pin quite close to each side of each corner to help neaten it.
When the whole thing looks right, you can adjust the spaces of the pins if you think it necessary, and push them right in. Make sure they go in straight or they may pierce the picture, or come out of the back of the board.
Cut a piece of brown paper a few mms smaller than the finished mounted silk on the board. Mark the centre at top of back of board, and attach hanger/hook. Mark the centre of the top edge of the brown paper, and cut a flap down the length and width of the hook/hanger. Turn it to the inside and tape over it. This neatens it and adds strength over the hanger.
Put a strip of double sided tape all round the board, very close to the edges. Peel back about 3” length of each piece of d.s.tape. Carefully position brown paper over the back of the board, and keeping one hand on the paper, peel off one length of d.s.tape. Smooth down, and repeat with other pieces of d.s.tape.
Plate hangers have very strong glue, and the packet will show the weight of plate which can be hung, so they are certainly strong enough for even a big piece of foamboard. If you have a very wide picture, you should probably put a hanger at each end.
The metal hangers are suitable for heavier pieces and have to be pushed down and along at the same time.
The Art of Suminagashi
Marianne Nash
The Art of Suminagashi literally means ‘ink-floating’. This is a technique which originated in China over 2000 years ago, and was taken up seriously by Shinto priests in Japan over 800 years ago. This is a method akin to the more well-known marbling designs called Ebru, which originated in Turkey.
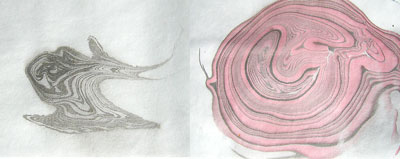
Suminagashi involves floating ink onto the surface of water. This is blown or fanned very gently to move the ink and form irregular patterns. A piece of absorbent paper, such as the Japanese Washi paper, is laid onto the patterned water. The paper immediately picks up the ink, and is carefully lifted off and set to one side to dry.

Members of the Chiltern branch tried suminagashi at the monthly meeting at Rainbow Silks in April.
Further information on the process from Marianne Nash.
